


by · MasLogin · October 9, 2025
When a browser visits a website, it automatically sends identifying information such as device details, IP address, user agent string, and plugin list. This information can be easily detected or tracked by platforms. In MasLogin, creating a new browser Profile requires setting up and filling in the Profile’s basic information (at minimum). Details are explained below.
Create a Profile
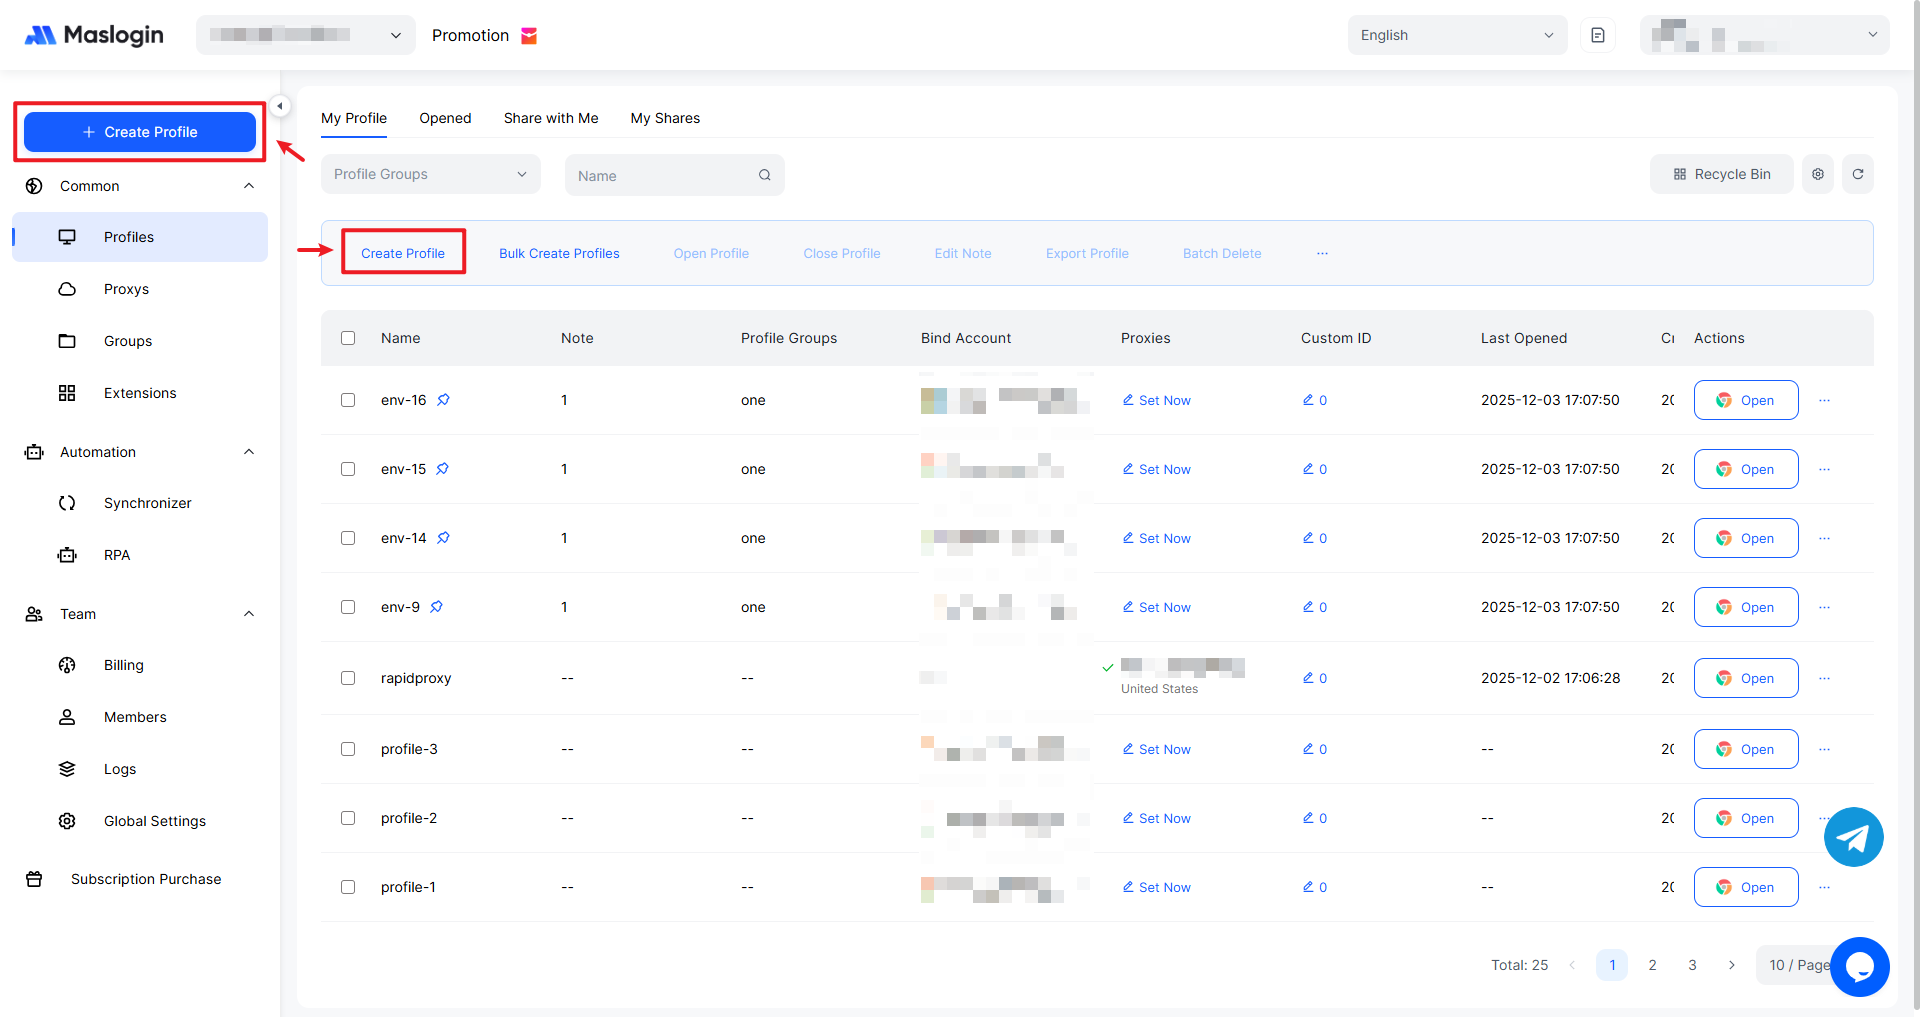
Open and sign in to MasLogin. In the left navigation bar or under 【Profiles】, you can find 【Create Profile】. Click to enter the Profile creation/editing page.
The Profile settings page looks like this:
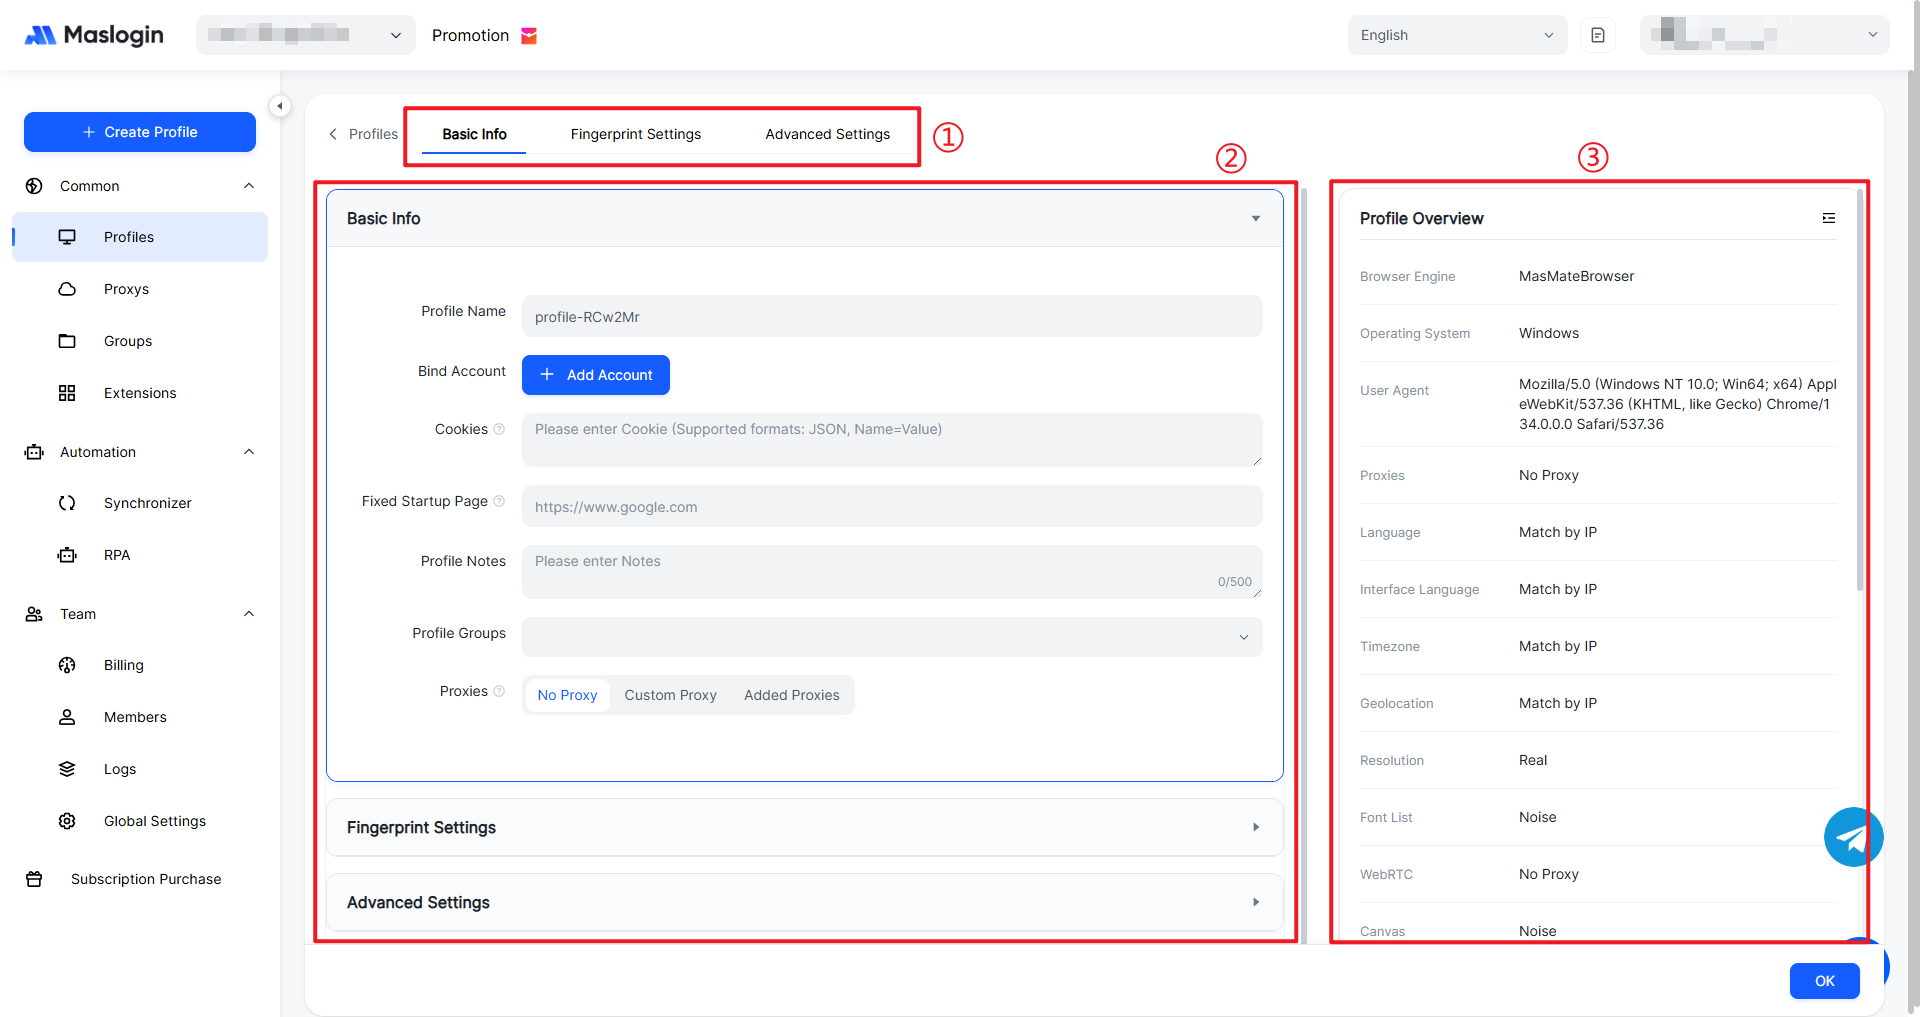
- ① Configuration tabs: Includes “Basic Info”, “Fingerprint Settings”, and more, used to switch between different configuration scenarios.
- ② Settings panel: A configuration list for Basic Information, Fingerprint Settings, and Advanced Settings details.
- ③ Profile summary panel: Visually displays key configuration info such as browser kernel, proxy, and various fingerprint parameters.
Edit Profile – Basic Infor
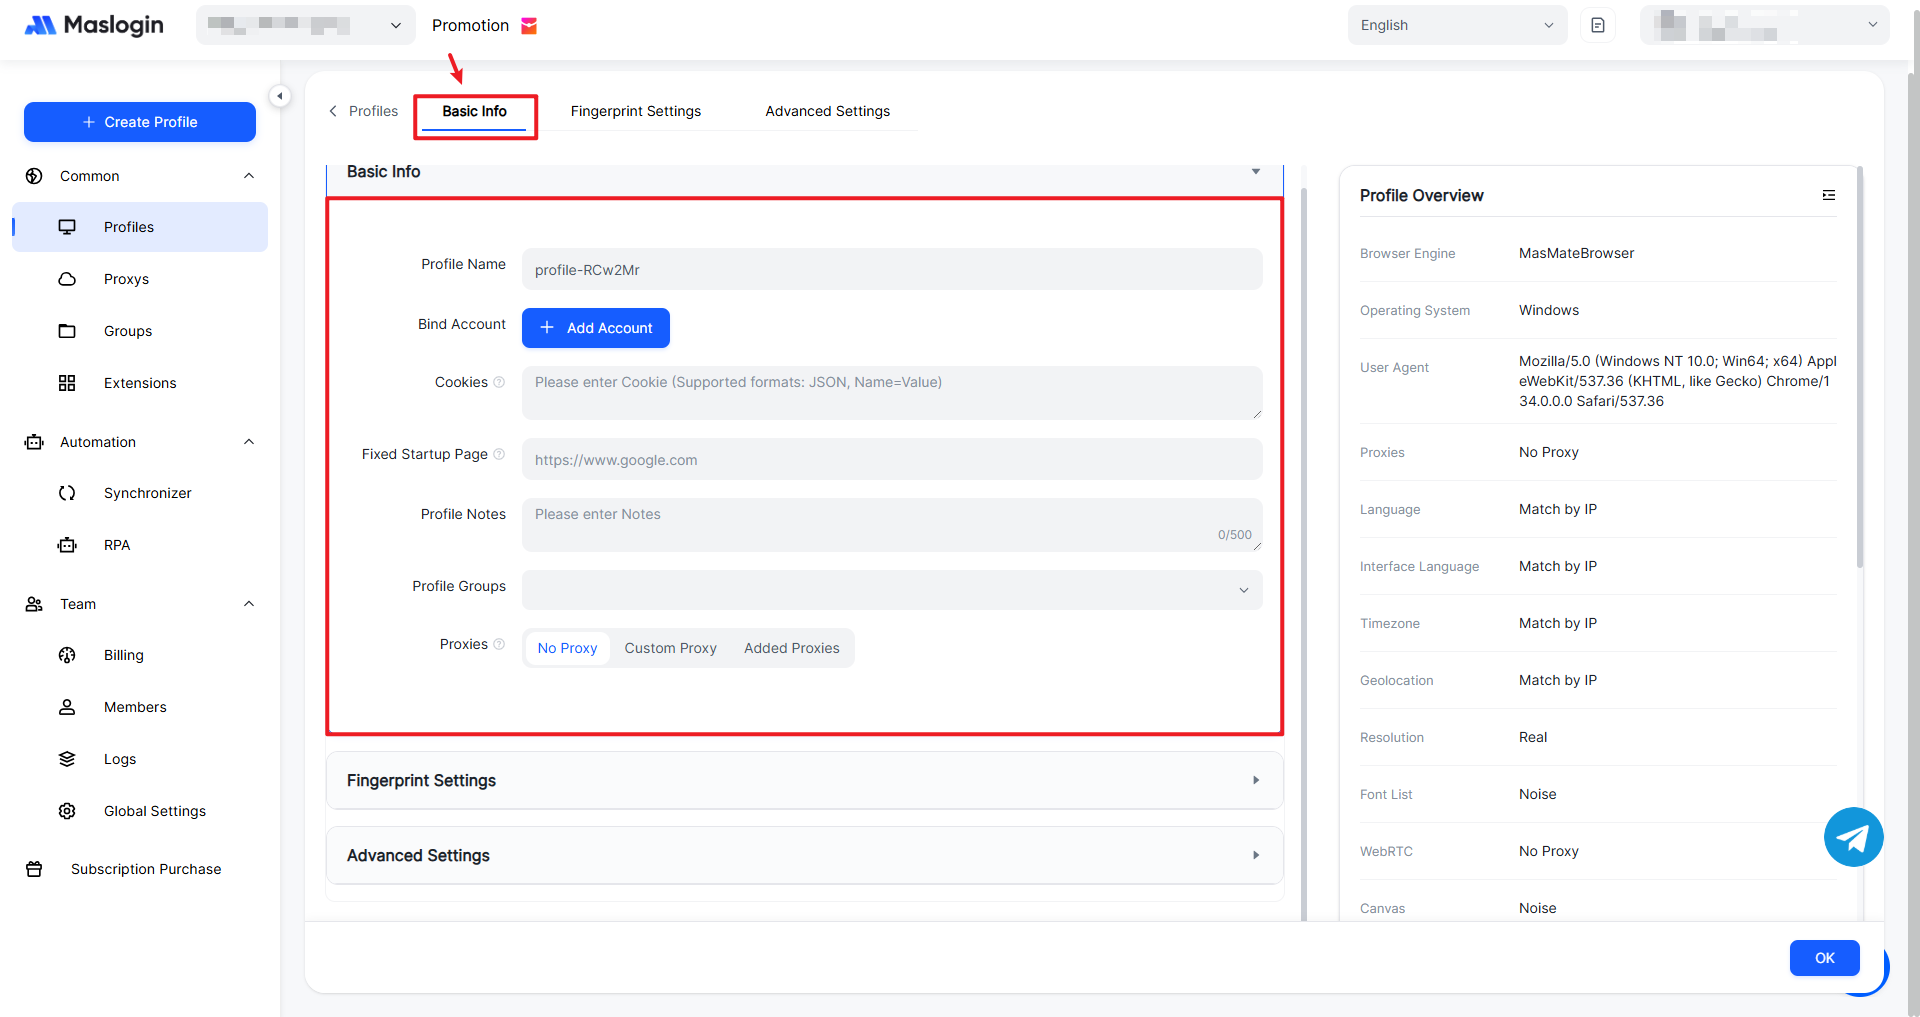
【Profile Name】: Required. It can be the same as an existing Profile name, but it cannot be empty. By default, the name is randomly generated as a combination of letters and numbers.
【Bind Account】: Optional. Select and set the account type you need to log in to or register.
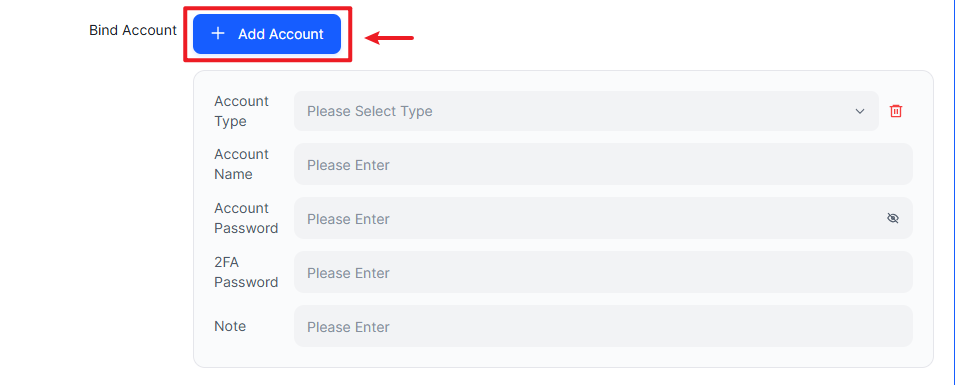
- Account Type: Provides options such as facebook.com, account.google.com, instagram.com, tiktok.com, and more;
- Account Name: The actual registered account name / email / phone number, etc.;
- Account Password: The actual account password;
- 2FA Password: A two-factor authentication code—an extra security layer on top of “username + password”, suitable for important accounts such as those used for payments;
- Note: Add a description for the account you added.
【Cookies】: Optional. Cookies are small text files stored locally by the browser to maintain state between the client and server. They can store login status, preference settings, session information, and more, allowing websites to remember a user’s identity during visits.
- When creating a Profile for the first time, you can paste cookies; when the Profile is launched, the corresponding cookies will be injected into the browser;
- When editing a Profile, you can update cookies; when the Profile is launched, the corresponding cookies will overwrite the cookies in the browser;
- After the Profile is launched, existing cookies plus new cookies generated by newly opened pages can automatically populate into this cookie input box;
- If the Profile is already running but you need to edit cookies, you must close and reopen the Profile for the updated cookies to take effect.
【Fixed Startup Page】: Used to set specific webpages that open automatically when the browser starts. If left blank, a blank page opens by default.
【Profile Note】: Optional. Add notes about the Profile to make management easier.
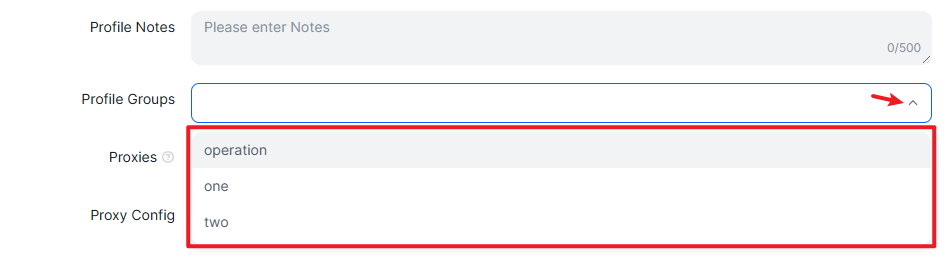
【Profile Group】: Choose an existing group or leave it ungrouped for now.
【Proxy】: A proxy routes network access through a specific IP address to hide your real IP. By default, you need to set a custom proxy.
- ⌈No Proxy⌋: Uses the local network connection directly without any proxy server. This is the fastest option, but it cannot hide the user’s real IP address and location.
- ⌈Custom Proxy⌋:
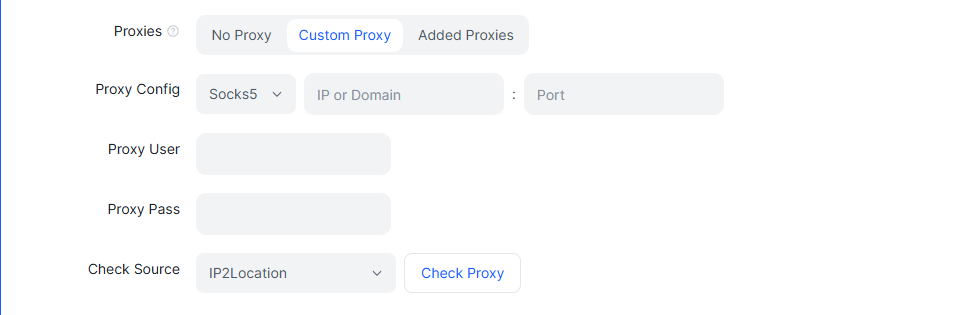
(1) Proxy Config:
① Proxy type:
- Socks5: A SOCKS proxy supports TCP and UDP forwarding and is highly flexible, suitable for many network scenarios including online games and P2P file sharing. It can hide the real IP address and bypass firewalls and geo-restrictions.
- HTTP: Connects through the HTTP protocol and is suitable for regular web browsing. It can hide the user’s real IP address, but does not provide encryption during data transmission.
② IP or Domain
③ Port
(2) Proxy User: The actual proxy account username;
(3) Proxy Pass: The actual proxy account password;
(4) Check Source: Used to check whether the proxy is available;
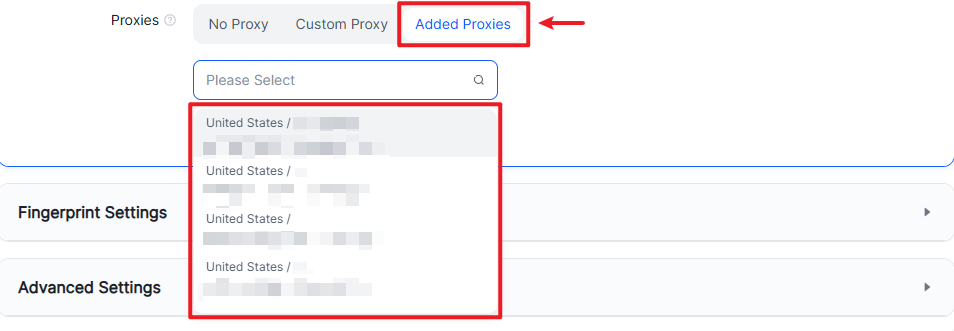
- ⌈Added Proxies⌋: You can directly use proxies that have already been added in 【Proxy Management】. These do not require repeated custom configuration.
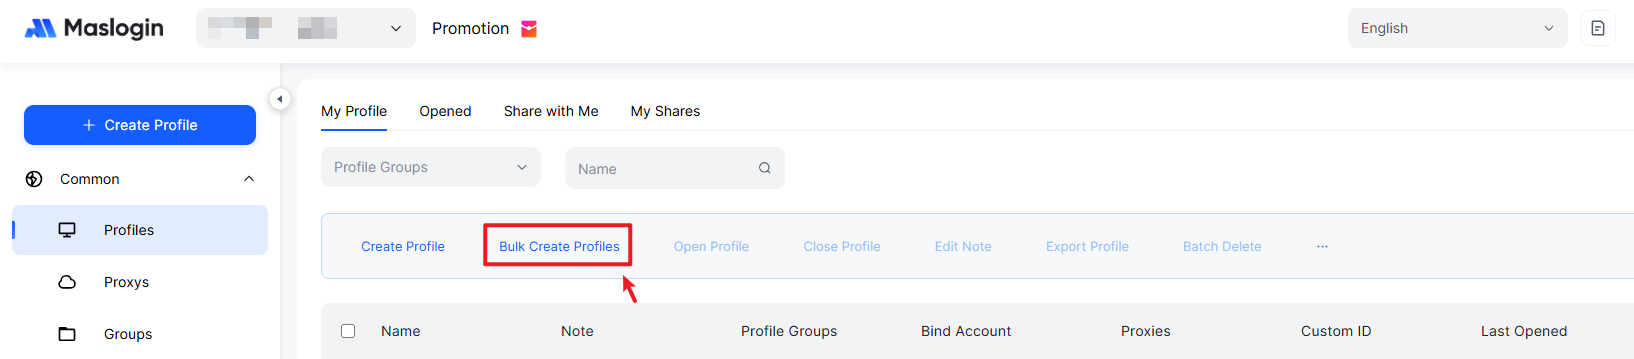
Batch Create Profiles
In the window list section, click 【Bulk Create Profiles】 to enter.
In 【Bulk Create Profiles】, the only differences are 【Create Quantity】 and 【Profile Name Prefix】. All other settings options are the same.
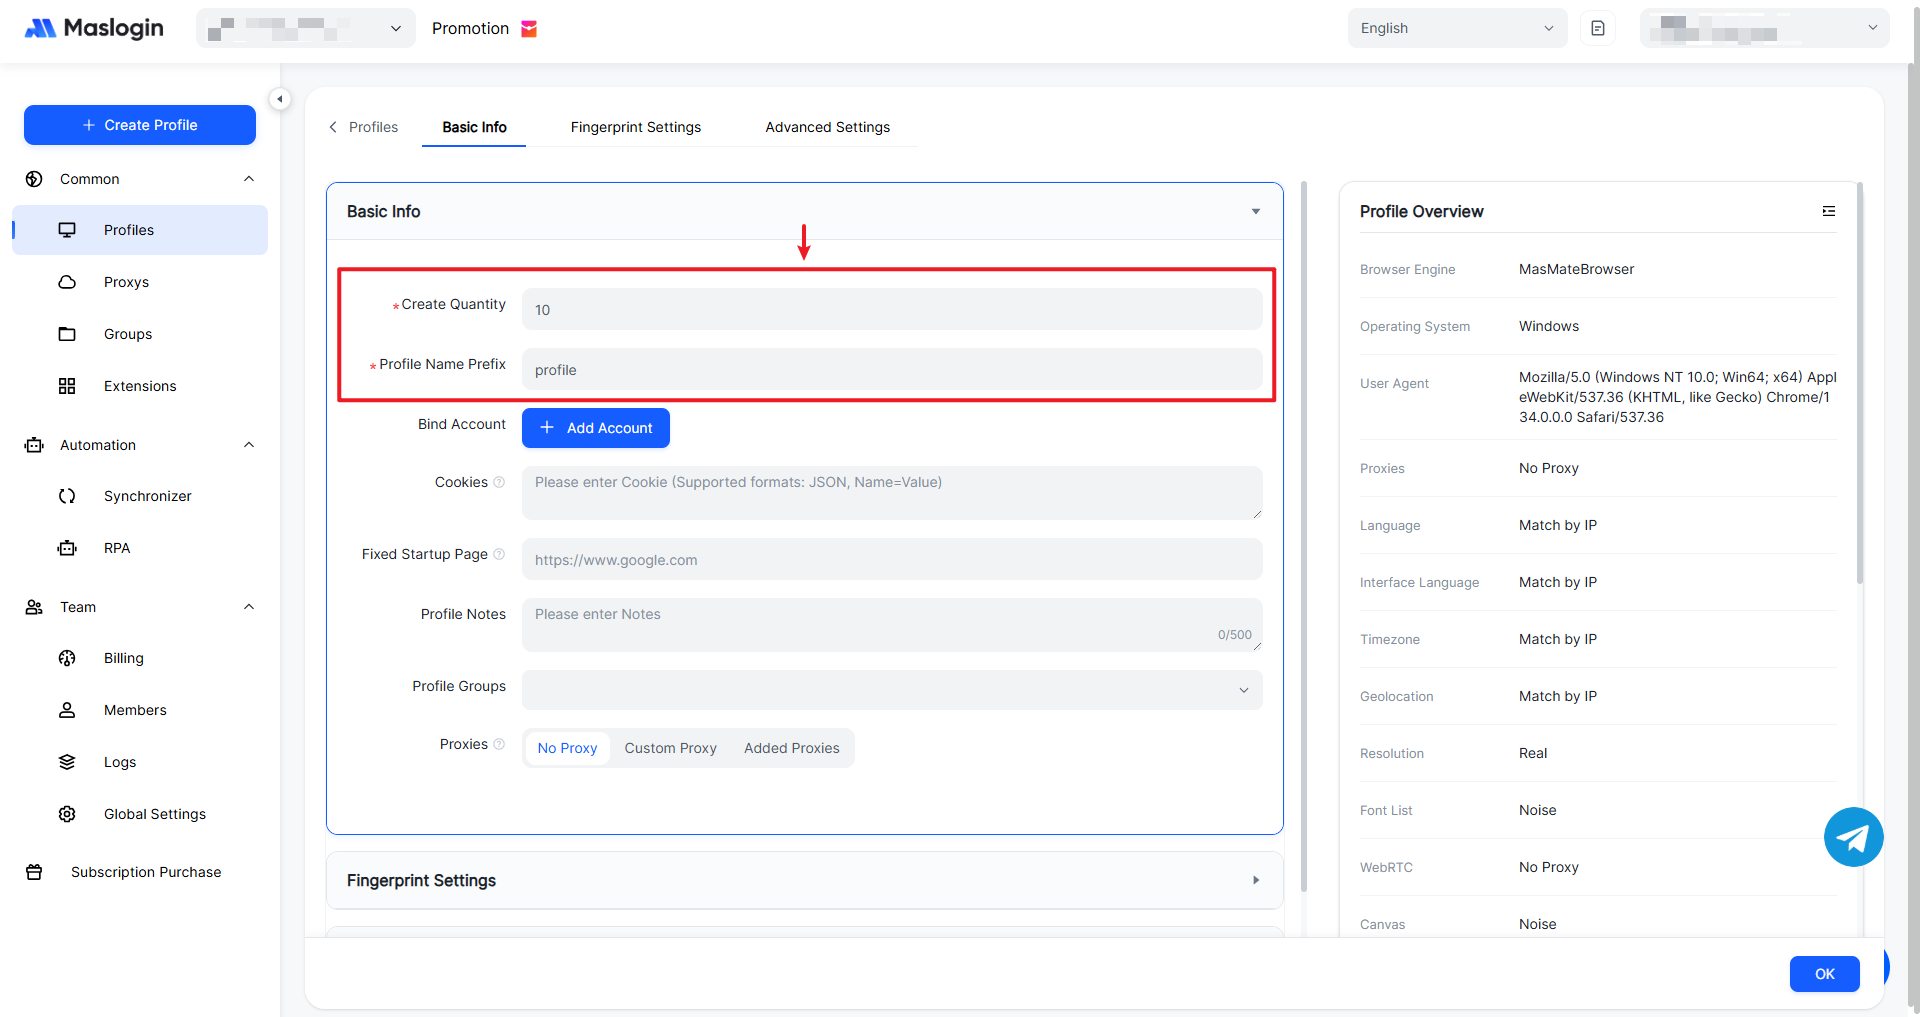
Batch-created Profile names follow the format 【 Prefix - XX 】.
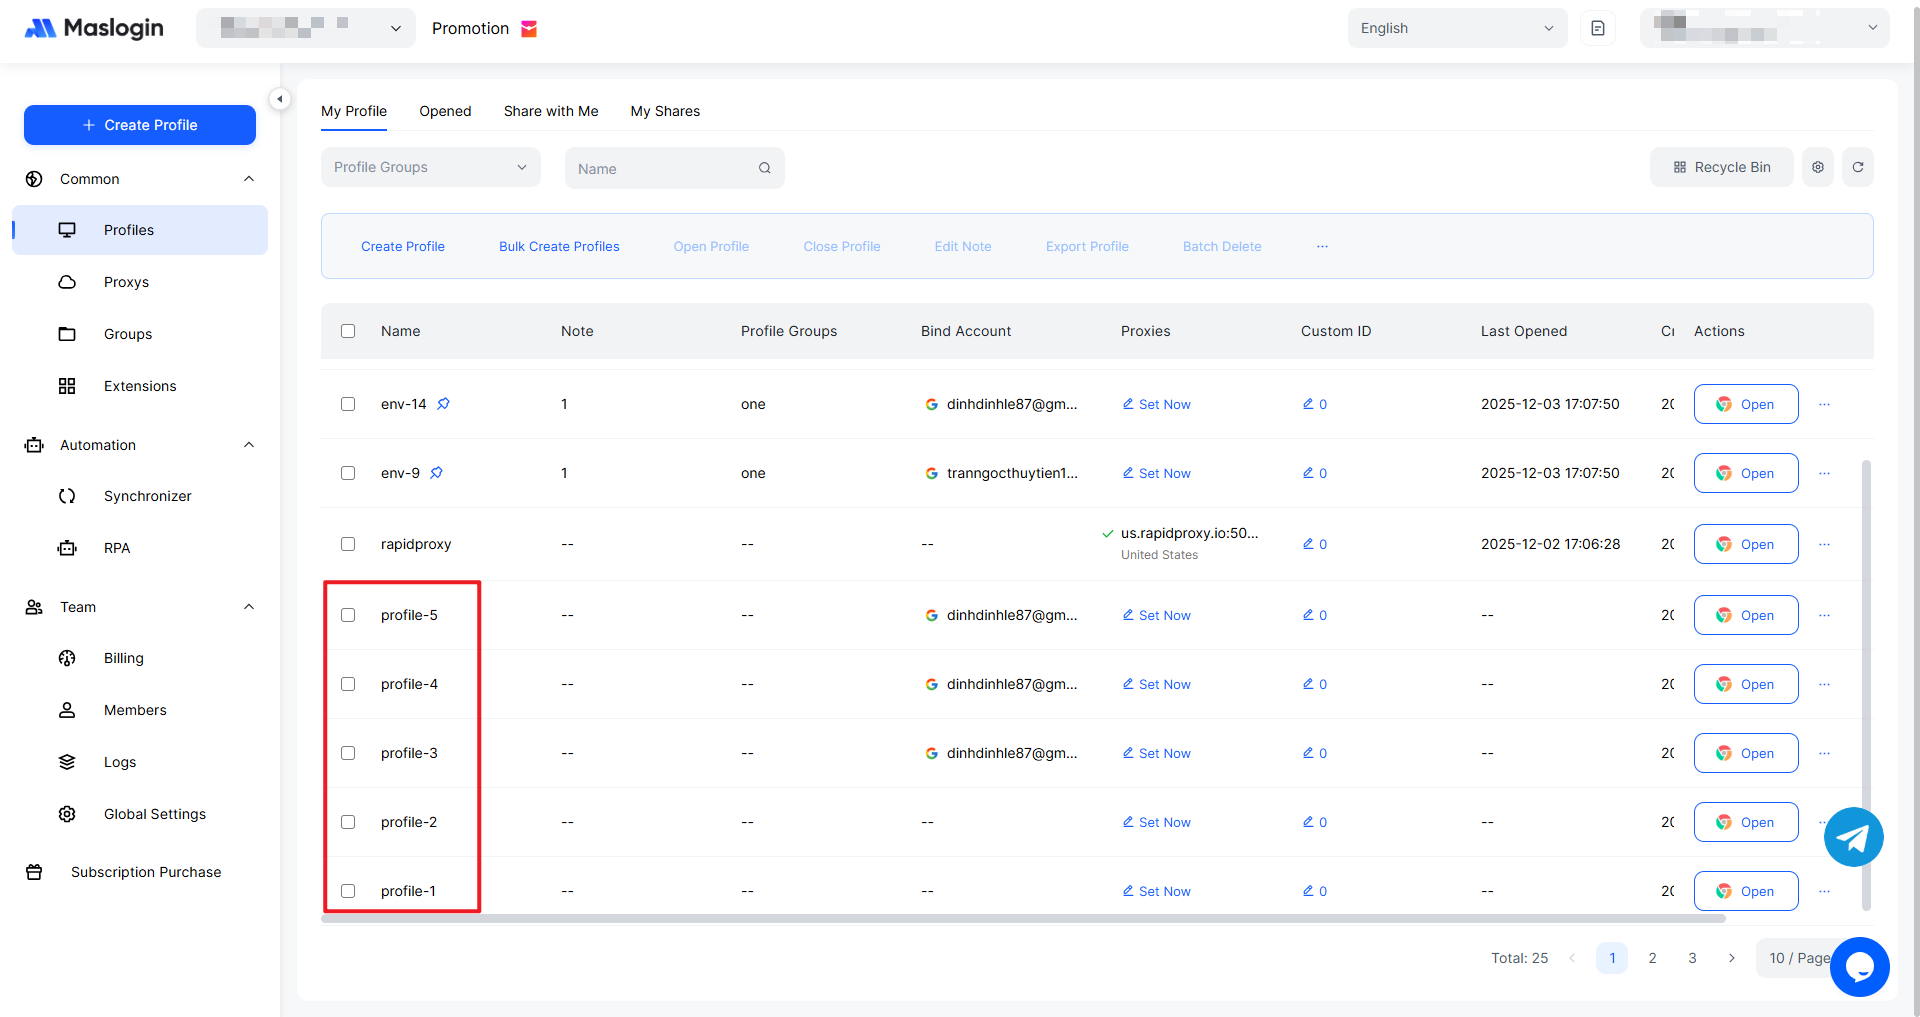
Note: Profile names can be duplicated, and one account can be used across multiple Profiles.